HTTPS should be everywhere, and lately, Google has considered this as a ranking signal to their search engine results. There are two primary reasons you should consider securing your website with an SSL certificate.
Security – to ensure sensitive data is encrypted from a user browser to the web server or network edge. Having SSL also give some trust to the visitor that your website is secure. SEO – HTTPS is a new ranking signal, and the big boss is watching you, so don’t be behind in the race.
If you are worried about the cost, then let me remind you, you can get the SSL certificate in FREE from many issuers. And most of the shared hosting offers free SSL. There are many ways to put this redirection, and the following is the easiest one I find.
Apache
Login to your Apache server and go to the path where it’s installed. Go to the conf folder and take a backup of httpd.conf file Open httpd.conf using your vi editor (choose your favorite editor) Ensure mod_rewrite.so module is loaded
If you see above line is commented then uncomment it Add the following at the end of the file
Restart Apache webserver to test it.
A configured website should be able to redirect and accessible on https.
Nginx
Login to the Nginx web server and take a backup of nginx.conf or default.conf file (whatever file you are using for server directive)
Add the following in server directive
Save the file and restart Nginx web server.
Restart Nginx to test the site.
Cloudflare
If you are leveraging Cloudflare for performance and security, then having a website through HTTPS is very easy.
Login to Cloudflare » select the site Go to SSL/TLS tab » Edge Certificates
Ensure it turned ON
There is another way, page rules.
Go to Page Rules Click “Create Page Rule” Enter the URL (put the asterisk, so redirection happens for all the URI) Click “Add a Setting” and select “Always Use HTTPS” from the drop-down
Click “Save and Deploy”
It will take a few seconds, and you are all set to have your website accessible through https. After using Cloudflare, if your site breaks due to mixed content, then check out the following guide.
cPanel
I assume you are using this on a shared hosting platform. First, you need to ensure the hosting provider offer SSL and enabled for your site.
Login to cPanel and go to the files manager where you can find .htaccess file Add the following at the end of the file
Note: if you already see “RewriteEngine On” in your existing file, then you don’t need to duplicate it.
Save the file and verify the redirection.
SUCURI
SUCURI offers FREE cert under the WAF plan, and you can enable it by navigating to the HTTPS/SSL tab. First, select “Full HTTPS” in SSL mode.
Second, select “HTTPS only site” in protocol redirection.
Save the configuration, and in a few seconds, you will have your site accessible through https.
Kinsta
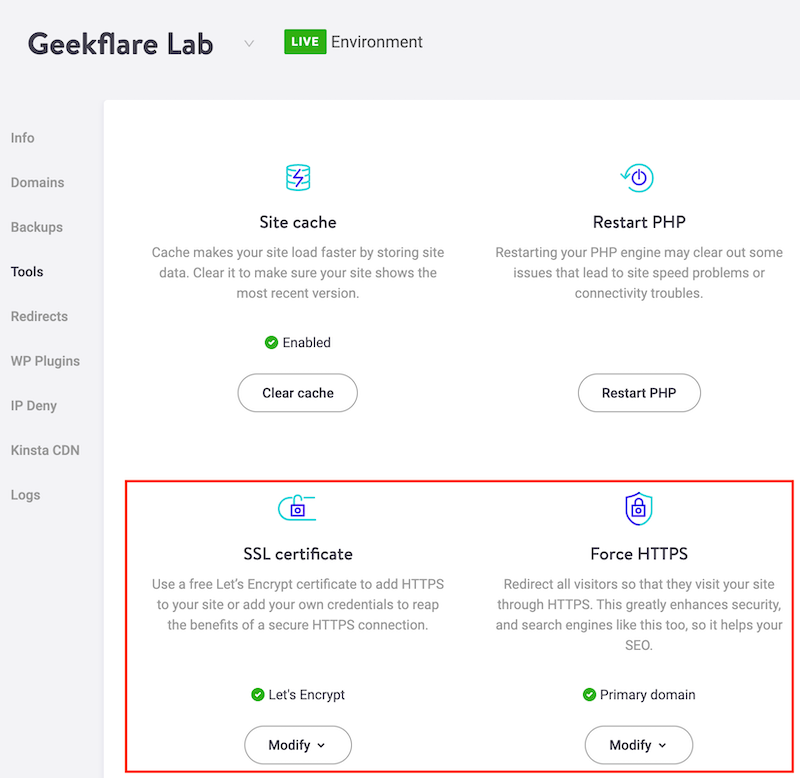
Kinsta, a premium WP managed hosting offer Let’s Encrypt certificate and let you force HTTPS with a single click.
Login to MyKinsta Select the site you want to enable and enforce HTTPS Go to Tools and enable Force HTTPS
SiteGround
SiteGround has its own control panel (earlier cPanel) and lets you implement SSL cert for FREE and give you an option to force every request to HTTPs. To do so,
Login to SiteGround Go to Websites tab Select Site Tools next to the website
Navigate to Security » HTTPS Enforce Toggle the button to activate it
What’s next?
Once you setup the redirection, ensure all the resources are getting loaded over HTTPS. You can use the Mixed Content Testing tool to verify if any resource is still getting loaded over HTTP.
And… If you notice and using WordPress, then you may have to use SSL Insecure Content Fixer Plugin, which will ensure all resources are served over https://. For Joomla, use Easy HTTPS extension. Conclusion I hope the above instructions help you. You may also want to test your site to ensure no vulnerabilities in the TLS configuration/certificate.


